
For the first eight years of my digital camera use all I ever did was download the files and then either stick them on a website or this blog when it came a long, or e-mailed them to an editor. No processing on the computer or anything. Since I got a digital SLR camera and more into making pictures I've learned a bit about improving on what the camera throws out. I blogged a little about this earlier, but here I'm going to try and explain (in simple terms) how to make your pictures look better - both on the screen and as prints.
Despite modern digital cameras being so reliable and giving flawless exposures every time there can be occasions when they're electronic brains are fooled. More likely it will be a case of user error that results in a less than perfect photo! Unlike the colour slide film which I used for many years, digital files are quite easily improved when you do mess up. provided it's not a complete fail!
In this article I'm going to deal with a few controls that are available in photo editing software. I guess most people use Photoshop Elements as it is widely known. I'm a cheapskate and use GIMP, which is a free download and does all I need and much more. The two controls which are of most use are Levels, and Unsharp Mask.
But first you have to decide where you will be showing the photos. If you are going to be making prints then you should work on the full size image from the camera in order to retain as much information as possible. If you are going to show the picture on the internet you can reduce it in size. I usually make my photos 800 pixels wide for internet use (although this blog reduces them further to fit the format they can bee seen at 800px by clicking on them). Whatever you are going to use the picture for make a copy of the original file, save it to a new folder and do all your processing on that file. Never save a modified file as the original.
Having made your copy open it with your editing software and find the Levels controls. This provides you with sliders to control the brightness of the light, mid and dark tones which is a reasonably sophisticated, but simple, means of controlling brightness and contrast.
This first picture is a flash shot and there is not much detail in the background. By moving the light and mid sliders around the detail in the shadows can be revealed.

The version below shows how the use of the Levels sliders has made the lighting more balanced and revealed the detail in the background.
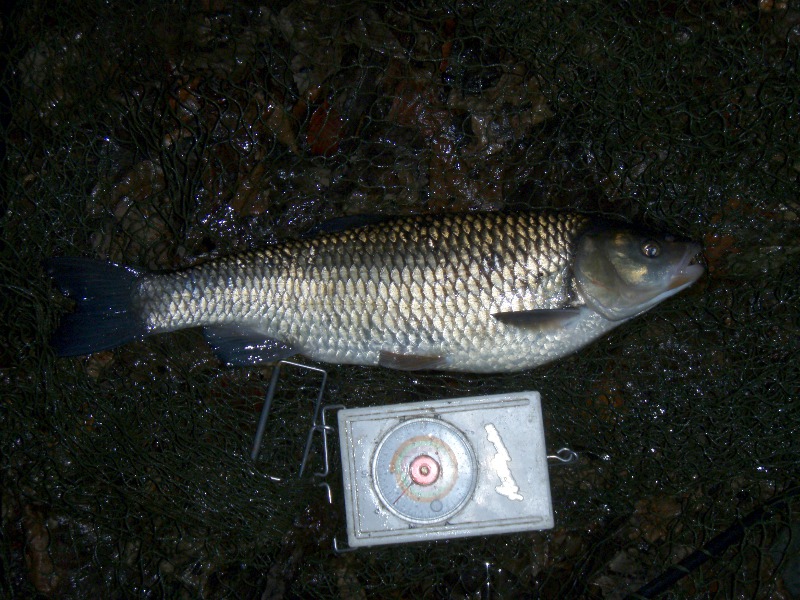
The fish still lacks definition. Using Unsharp Mask will give it some punch. Careful use of Unsharp Mask has brought out the detail in the fish's scales and increased contrast a little.

It is better to err on the side of caution when sharpening pictures or the effect will become unnatural looking.That said, when sharpening a picture which is going to be printed out you can go a little further than when sharpening for display on a screen.
There is a third control which can come in handy when photos look a bit 'flat'. Like sharpening it is easy to overdo, but the Saturation slider will make colours brighter. The picture below has had a further tweak to the levels and the saturation boosted to bring out the colours in the wet leaves.

Once you are happy with the result save it as the copy- not the original!
That was a photo which was too dark. I struggled to find one which was too light in my files, so this tench photo will have to do.

A fiddle with the Levels sliders, and a touch of the Unsharp Mask filter turned the above shot into the one below. The difference is quite subtle in this case. It's always better to under-do things than go too far and make the photo look unnatural.

Sometimes Levels adjustments can boost colours unnaturally. The solution is to use the Saturation slider to reduce the saturation. Selecting to alter just the red saturation makes the skin tone more natural.

It's not often I need to mess with the saturation, to be honest. Mostly Levels does the job just fine. For a technophobe the Levels and Unsharp Mask controls will make the biggest improvements for the least hassle. There is probably only a handful of photos on this blog since 2010 that haven't had the levels adjusted and some sharpening done to them.
All the above photos were taken as JPEGs (as were all my digital pictures used in Pike and Predators over the years and the majority of those on this blog) and processed as such. However, it's well worth shooting in raw format if your camera allows it. There is much more leeway for exposure, and far more control over the tones available. The same principles apply, though. You are still adjusting tone, sharpness and colour. Messing with anything else isn't really necessary for most purposes.