Saturday, July 20, 2024

More tackle talk

For a few years now I've been using leger stems for my eel fishing. I know full well that when the line is tightened they don't stand upright, but once the line is out of the clip they do, which might help the line flow more freely. The way I've been making them is quite simple and so far has withstood casting using two ounce leads. I've tried pulling them apart with my hands and failed so I tested one to destruction using a spring balance which had stretched to eleven pounds when one swivel parted company with the stem.

All they take are a couple of large eye swivels, a rig clip, a length of stiff boom choosing, a buoyant body of some sort and some glue-filled shrink tube.


Squash the small eye on a swivel and the large eye on the other. Clip the lead clip to the now small eyed swivel. Slip a piece of shrink on to the boom tube, fit the squashed eye of a swivel into the end of the boom tube, slide the shrink over the swivel body and heat with a heat gun. Push the boom tube through the buoyant body and repeat the swivel attachment at the open end. Push the buoyant body up and the job's done.

Eel fishing is a frustrating pastime and it always gets me thinking. My first tackle modification spurred on by an eeling problem was brought about by my ineptitude at getting the wriggling buggers in teh landing net at the first attempt in the dark. I can never see where the net cord is and far too many times I've lifted the net before an eel has been right over it. Give them an inch of tail over the cord and they back out!

I should have thought of the obvious answer years ago. Paint the last eighteen inches or so of the landing net arms white. For good measure I put a wrap of reflective tape at each end of the paint, then applied epoxy rod varnish over it all for protection. So far I haven't had to make any second or third netting attempts.

My second tackle development was to solve the rig storage issue. Coiling hooklinks in grip-seal bags is OK with wire which springs straight, but the hard mono links I use with worm baits takes on a curve. I had been putting a few in a stiff plastic hook packet. They had a tendency to tangle and I thought there must be a neater way. 

Being old I dredged up a memory of an article in a 1970s about using a cigar tube to store hooklinks by putting the hook over the open end and tucking the other end under a rubber band. I found some plastic tube and gave it a try. It was OK but the rubber band was a fiddle to use and the swivel or loop ends flapped about if they weren't all the same length.

Lateral thinking came to my rescue and I tried a piece of scrap Duplon rod handle material and may pins as used on many a flat rig board. The Rick Stick was born!


 I could just about squeeze 20 hooklinks onto the 'stick'. While I considered putting it in a tube for protection it fits neatly enough in my tackle box without.
 
 
Finding it awkward using my lightweight bobbins (see here) by attaching them to the uprights of the rod pod my current venues force me to use, as the swims are not bankstick friendly, I wanted to adapt the pod so the bobbins were attached directly below the rear rest heads.

I didn't like the price of the commercially available fittings intended for this which attach between the rest head and the buzzer bar. They didn't look very long either. No matter where I rummaged there was nothing to be found that I thought could be adapted for the purpose. Staring at the pod one night hoping for an indicator to move it struck me that the bobbins didn't have to be attached to an upright. A cross bar would do just as well.

I have lots of old banksticks in various stages of decay. One was cut to a suitable length and temporarily fitted to the pod using a couple of hair bands. In practice the hair bands weren't up to much but they let me prove the concept worked. Which it did.

I tidied up the cross bar by wrapping black insulation tape around it and fitting a plastic cap to each end. A couple of Terry (tool) clips were attached using self-tapping screws so the bar can be moved up and down and removed altogether when not required. I would have used nuts and bolts but I had none suitably long. If the screws fail I'll have to get some.


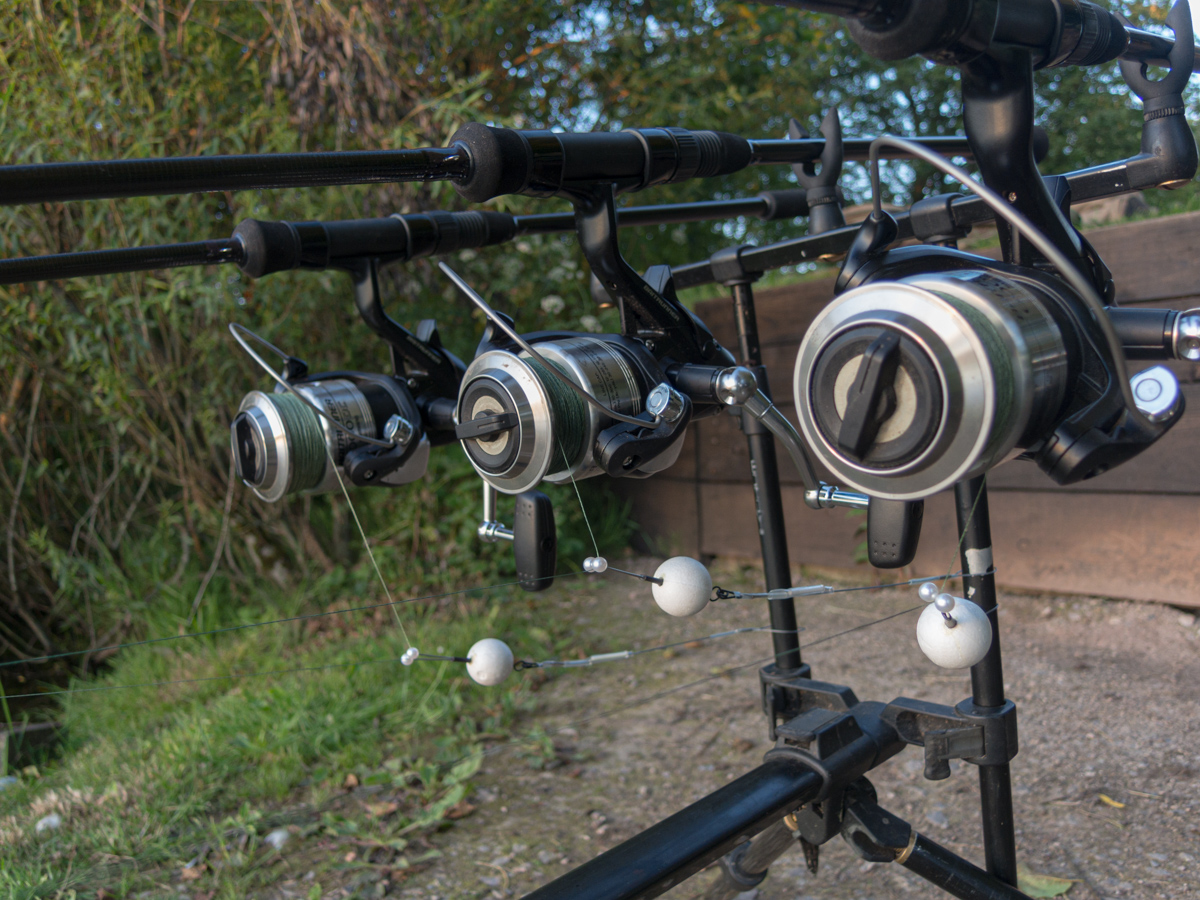
In practice the set up works well. An unexpected bonus is that by turning the clips that the bobbins are attached to round the cross bar I can finely tune the indicators without having to fiddle with the reels. Neat. It's also occurred to me that by attaching the cross bar to the front of the pod I can use the indicators on a drop of almost twice the length of the cords should I want to.

The final (?) mod to the bobbin set up was to acquire some better cord. Entering '1.5mm braided cord' into Google soon tracked some down and had 5m winging its way to me. A big knot in one end to stop it pulling through the hole in the Terry clip and a piece of the magic glue-filled shrink at the other to form a loop to take a clip and everything was complete. The bobbins did their job again, dropping off and the eels taking line freely. As usual my conversion rate was pitiful!


I wonder what I'll be tinkering with next?

Saturday, July 13, 2024

Back to basics

Over the last dozen or so years of my intermittent eel fishing I've tried all sorts of bite indication set-ups (apart from float fishing). I started out fishing open bale arms using light weight rear drop-offs with the Gardner clips I use for pike fishing. Then I tried the same bobbins at the front on a long drop and baitrunner engaged just in case.


Next it was short drops and heavier bobbins sometimes even straight off the 'runner with no bobbin. All worked to a degree, all failed to a degree. I know that the 'Rollover' indicator is supposed to be as resistance free as you can get. But have you seen one, let alone tried to set three of them up on a rod pod? I was given one and can't fathom out how the bloody thing works - even after watching a video! Another over complicated angling solution.

One evening when the eels were taking a couple of 'clocks' off the baitrunner I had a flashback. Way, way back my eel bobbins were a short length of balsa dowel with a hair grip glued in one end and a screw eye in the other. On the ends of the hair grip prongs were glued plastic beads. They'd started life being used off the front rests as old school bobbins for tench after I got fed up of Fairy Liquid bottle tops! I couldn't remember having dropped runs using those. I'd actually found them a few weeks previously.

 I reckoned they worked because they were lightweight and that meant the clips didn't have to be set very tight to prevent the bobbins falling off the line. This has always been how I like my drop-off bobbins. The trend in pike fishing for heavy bobbins to show slack line takes results in the clips having to be tight, offering more resistance on the more common run. Drop-back indications have never been much of a feature of my piking, and even less of my eel fishing. If you use cord to attach the bobbin to the rear rod rest you can see a slack liner even with a light bobbin. That's another story though.

I was sure I could make a more modern version of this indicator if I could find the right components. The clips would be the hardest part. Map pins are too short. What about hat pins? They proved elusive with beaded heads, but a bit more internet searching turned up something similar. Florists pins.

How to turn them into a clip was the next, easily solved, problem. Initially I thought of simply pushing them into a polyball or similar.  A bit crude. My old friend glue-lined shrink tube came to the rescue. Put two pins in a bit of tube, grip the ends in a pair of pliers and blast the tube with a heat gun. I did some dry tests to determine how much of the pins should protrude from the shrink tube before getting the heat gun out.

The MK1 bobbin was hastily assembled from a polyball and a swivel which was also heat-shrunk onto the pins. This was just to use as a proof of concept. 

It worked a treat first time out. I had a take on one of the other rods that was dropped. It was a quiet night and that was the first take. I swapped the bobbins over and when the same bait was taken again the bobbin softly fell from the line and a 'proper' run progressed. The eel was hooked, landed, weighed and returned. Success!

Now to neaten the bobbin up. Quite simple. Chop a clip down with a pair of side cutters, glue the clip into a polyball with a swivel opposite and iMK2 was ready for action.


White polyballs show up surprisingly well after dark but I thought an isotope would be easier to see. Clear shrink tube came in handy for this. I shrunk the isotope onto the nylon coated wire I was using as a 'cord'.

The wire isn't ideal for the job. It doesn't tangle like a thin braid can, but it's difficult to get straight too. I know exactly what I do want for making the cords, it's level fly line. The original bobbins had that and it's flexible yet tangle proof. Alas I can't find any in my boxes of 'stuff that might come in handy one day', and it seems rather expensive to buy to use about three feet!

The MK2 bobbin plus isotope worked a treat. Even with the alarms switched off a falling isotope catches the eye. They looked a bit unrefined though. Not that it bothered me. I still thought I could improve things.

More searching on-line and acrylic tube was discovered. Marvelous. A 150mm piece of 4mm inside diameter tube was cut into three equal lengths. A swivel had one eye squashed and covered in the magic glue-filled shrink and then glued into one end of the short tube. A cut down clip would go in the other end. That would look a bit unsightly so to cover the eyesores I wrapped some reflective tape around each end of the tube. To stop the isotope rattling about - and to centre it - I poked a piece of foam into the tube. A dab of hot-melt glue secured the clip in place and the MK3 bobbin was ready for action.

You might ask why I didn't just use the old bobbins in the first pics on this page. The answer is that light as they are, they're not as light as the ones I've made. Simple as that. For the time being I have 80lb Kevlar braid attached as the cord until I find something better. In practice it works as well as the originals. Despite appearances the clips can be adjusted. Pulling the beads apart slackens them, twisting them around each other tightens them. The aim is to have them as slack as possible. Using 50lb PowerPro on the reels I'm finding them to work great. The line release is 'soft' for want of a better description, and I'm getting far more actual runs than the other indication methods gave me. So far!

That's the story of one of my eel fishing improvements this season. Stay tuned for a couple more! You'll have to wait a bit longer to see if I've actually caught anything....


Tuesday, July 02, 2024

Catch up time

 I thought I'd write a bit of a post partly because I've got a boring evening to pass. Mostly because I need to get some writing practice in. I've got rusty. Last winter was too wet for me so I didn't fish much and there was nothing tow rite about. My piking didn't start until February when there were a few milder, drier days. Even then it was only three short afternoon/evening sessions. The first and last being resounding blanks. The middle one was different.


I had a plan in mind of where to fish but had a walk round a few swims anyway as I'd arrived in good time. As I passed one tight little peg I really liked the look of it. I carried on and didn't see anything to divert me from plan A. But passing the tight swim on my way back to the car park I got 'that feeling'. I could give it an hour then revert to the plan.

By two o'clock I had got settled in Three float legered deadbaits, a lamprey section to my left near some reeds, a joey mackerel further out to some more reeds jutting into the lake, and a hated sardine, bound to the trace with red knicker elastic, dropped off the edge of a marginal bush to my right. I sat down and started to knock up a new trace as I'd no spares in the box. Hardly had I got going when the margin float began to move off. As soon as I wound down I knew it was a decent double. When it's head popped up It looked a bit better than that. In the net it was debatable. Don't let anyone tell you my Loch Tamers don't bend. They do when you give the fish some stick!

On the bank I could see my hooks in the net, but there was line coming from the pike's mouth. Lodged in the scissors was what looked like a shop-bought trace with about a yard of ten pound line attached. The fish looked a bit on the lean side and sure enough didn't make the hoped for weight. Not that I was bothered.

After the chaos was over and the fish resting in a sack I set the camera up for the first self-take for a long time. Wounding the other rods in just in case a bait was taken while I was doing the photo job.

With the fish safely returned the baits went back out. I couldn't believe it when the far float set off out into the pit. This time I fluffed the strike and bumped off what felt like another double. That's what a lack of practice does for you.

By four thirty I was wondering whether I should stick it out into dark in this swim or have a move. the move won. I didn't go far and one rod was covering pretty much the same area as the far rod had. After less than half an hour the margin macky was away. A smaller double being the culprit.I'd now run out of joeys so put a herring head on the hooks. I used to prefer herring to mackerel in the 1980s, but when tackle shops started to sell frozen baits it was too easy to use what they had rather than go to a fishmonger and buy what you wanted. Besides, fishmongers had a habit of gutting herrings. These days I stock up on them when I see them in tackle shop freezers. The bigger ones just about make two baits, and the smaller ones are a nice size to use whole.

It was forty minutes before the herring rod was in action. Another decent double unhooked and returned.


 I fished on until quarter to seven without another sign of action. 

 With spring continuing the wet theme of the winter it was the middle of May before I fished again. I spent most of my free time photographing sheep. Both at sales and in the lambing sheds and fields for a long term documentary project I'm working on. When I did fish again it was for eels. My eel head is firmly on at the moment, and the challenge has got me thinking and wanting to try out my ideas. More on that another time...


Tuesday, April 23, 2024

Rod evaluation

The sun shone and I got motivated to have a few chucks with the heavier of the two 8ft 6in two-piece American Tackle Bushido rods. I took the usual box of lures plus a regular Bull Dawg and a Mag Dawg. The regular was clipped on and I made my first cast with the heavy rod. It flew out smooth and easy. A rod length out a greedy little jack grabbed the Dawg! I'd not bothered taking a camera as I was only going to stop in one swim to get a feel of the rod and compare it with the lighter one, so I used my phone. 

A few more chucks and the rod could obviously handle more. It is rated as 150g after all. Sure enough it had no trouble casting the Mag Dawg (211g on the scales at home). Other lures tried on the rod were a Manta, a Giant Jackpot, a Squirrelly Burt (obvs...), and a fibreglass Dolphin. Not only did it cast them well the tip was stiff enough to work them.

The lighter rod (rated as 130g) was up to casting the regular Dawg, but the tip is too soft for working jerkbaits in my estimation. A rod beest used for lures that are fished on a straight retrieve, and smaller twitchbaits and soft plastics on jig heads. If I'd had a rod like this 20 years ago I'm sure I'd have spent more time fishing creatures, slugs, reapers and so forth.

The two rods I've been using were experimental builds. The handles an inch longer than I fit to my Axioms etc., and this made a bit f a difference when casting the heavier baits so has made the final spec. The lighter rod has a cork handle, but I tried an abbreviated Duplon handle on the heavier rod. I'm not a fan of Duplon on lure rods but it felt OK in the hand.

Where I slipped up was not working out a Rover Ringing pattern for the rods. D'oh! I left that until I built one of the lighter rods for a customer. Handle will be cork in my usual style but with a short foregrip and a gunsmoke collar. Rings (pattern to be decided) will be 20mm butt down to an 8mm tip. Thread colour dark grey with a pale grey tip to the hook keeper.

Prices to be confirmed once I've settle on ring pattern.

Thursday, January 04, 2024

New Year, new rods

The winter break saw me  working as usual. In among the standard builds were some odd jobs. First up a Sledge-Hammer 60H that I was asked to build as a sea boat rod. Neither I nor the customer are sure if it will work, but at least the handle, including gimbal type butt cap, are right!

 
Another odd job was rebuilding a pair of old, as in over 25 years, Harrison Baby Ballistas that had been chopped down to 10ft 6in. One needed a complete rebuild, one needed the tip replacing, and a third new one was to be built to match. Full Duplon handles with short flare foregrips. Now looking as good as new.
 
 
Last up in the 'something different' category is a rod which I'll be adding to my list shortly. I had one on show at the PAC Convention and it met with approval. The blank is an American Tackle two piece, fast taper, 'Bushido'. There are two models, the one shown here is the lighter.
 

The blanks are woven for the most part, with the weave ending part way up the tip section as per a Harrison Chimera, joints are overfits. 8ft 6in long, rated to cast 130g, I've found this model to be best with lures that are cranked straight back. The tip is much softer than my Axioms and Sledge-Hammers, and indeed softer than the heavier Bushido. As soon as I can get motivated I'll be taking the heavier rod out for a play. It should be good for big swimbaits, and even for working jerkbaits as the tip is stiffer. This one is the same length but rated to 150g.